와일드카드 ssl 인증서 적용
와일드카드 ssl 인증서 적용

root@:/opt/bitnami/apache/conf/vhosts# cat wordpress-https-vhost.conf
<VirtualHost *:443>
  ServerName yourDomainName.com
  ServerAlias www.yourDomainName.com *.yourDomainName.com
  SSLEngine on
  SSLCertificateFile "/etc/letsencrypt/live/yourDomainName.com/fullchain.pem"
  SSLCertificateKeyFile "/etc/letsencrypt/live/yourDomainName.com/privkey.pem"

  #SSLCertificateFile "/opt/bitnami/apache/conf/yourDomainName.com.crt"
  #SSLCertificateKeyFile "/opt/bitnami/apache/conf/yourDomainName.com.key"
  DocumentRoot /opt/bitnami/wordpress

  Include "/opt/bitnami/apps/letsencrypt/conf/httpd-prefix.conf"

  <IfModule mod_proxy.c>
    ProxyPass /.well-known !
  </IfModule>

  RewriteEngine On
  RewriteCond %{HTTP_HOST} ^www\.yourDomainName\.com$ [NC]
  RewriteRule ^(.*)$ https://yourDomainName.com$1 [R=301,L]

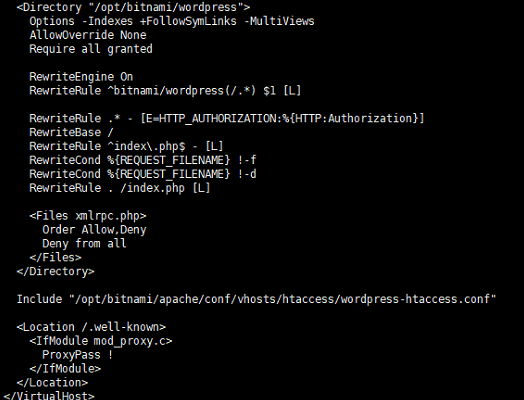
  <Directory "/opt/bitnami/wordpress">
    Options -Indexes +FollowSymLinks -MultiViews
    AllowOverride None
    Require all granted

    RewriteEngine On
    RewriteRule ^bitnami/wordpress(/.*) $1 [L]

    RewriteRule .* - [E=HTTP_AUTHORIZATION:%{HTTP:Authorization}]
    RewriteBase /
    RewriteRule ^index\.php$ - [L]
    RewriteCond %{REQUEST_FILENAME} !-f
    RewriteCond %{REQUEST_FILENAME} !-d
    RewriteRule . /index.php [L]

    <Files xmlrpc.php>
      Order Allow,Deny
      Deny from all
    </Files>
  </Directory>

  Include "/opt/bitnami/apache/conf/vhosts/htaccess/wordpress-htaccess.conf"

  <Location /.well-known>
    <IfModule mod_proxy.c>
      ProxyPass !
    </IfModule>
  </Location>
</VirtualHost>
와일드카드 ssl 인증서 설치 방법
1. Certbot 설치
먼저 Certbot을 설치해야 합니다.
sudo apt update
sudo apt install certbot
2. SSL 인증서 발급 및 설정
Amazon Lightsail의 경우, Route53과 유사하게 작동하는 API 자격 증명을 직접 제공하는 경우는 드물지만, DNS 레코드를 직접 관리할 수 있습니다. 아래와 같이 Certbot으로 도메인과 와일드카드(*.totel.link)를 포함하여 인증서를 발급해보세요.
sudo certbot certonly --manual --preferred-challenges=dns -d "totel.link" -d "*.totel.link"
Certbot이 실행되면 DNS TXT 레코드 생성을 요청합니다. 이때 Lightsail의 DNS 관리 페이지로 이동해 지정된 TXT 레코드를 추가합니다.
3. Bitnami SSL 파일 설정
위에서 설명한 단계와 동일하게, 인증서 파일을 Bitnami Apache 설정 파일과 연결하고 Apache를 재시작합니다:
sudo ln -sf /etc/letsencrypt/live/totel.link/fullchain.pem /opt/bitnami/apache/conf/server.crt
sudo ln -sf /etc/letsencrypt/live/totel.link/privkey.pem /opt/bitnami/apache/conf/server.key
sudo ln -sf /etc/letsencrypt/live/totel.link/chain.pem /opt/bitnami/apache/conf/server-ca.crt
sudo /opt/bitnami/ctlscript.sh restart apache
4. 자동 갱신 설정
Lightsail에서는 도메인에 따라 인증서 갱신이 자동으로 되지 않으므로, cron 작업을 통해 수동으로 갱신해야 합니다.
sudo crontab -e
다음 명령을 추가하여 자동 갱신과 Apache 재시작을 예약합니다:
0 0 * * 0 certbot renew --non-interactive --post-hook "/opt/bitnami/ctlscript.sh restart apache"
이제 3개월마다 자동으로 갱신되며, 모든 Lightsail 서브도메인에 SSL 인증이 적용됩니다

목차
답글 남기기