
The cause of this error is a folder permission issue
It can be solved by following as below.
your forder in phpMyAdmin
mkdir tmp
chmod 777 tmp/


Solved error!
good luck 🙂
other Solution.
the $cfg ‘tempdir’ (/var/www/phpmyadmin/tmp/) is not accessible
개인서버구축


The cause of this error is a folder permission issue
It can be solved by following as below.
your forder in phpMyAdmin
mkdir tmp chmod 777 tmp/


Solved error!
good luck 🙂
other Solution.
the $cfg ‘tempdir’ (/var/www/phpmyadmin/tmp/) is not accessible


The reason why mail sending error is because I can’t access IP.
Check your mail server IP for external access.
If there is a firewall or an external blocking service, this part should be set up.
If you are a Linux user, you must set up both ipable and firewalled and verify SELINUX access.
In my case above, it was returned with a mail error due to lack of external access.
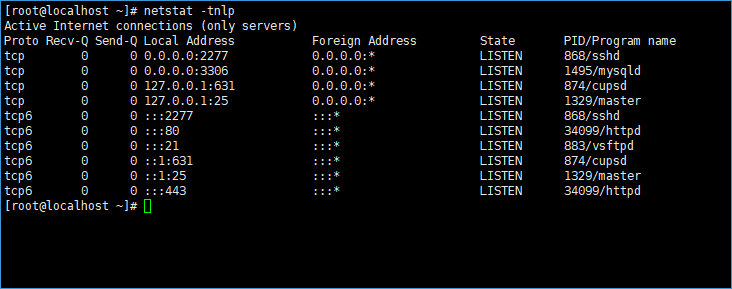
SMTP port check!

25, 465, 587
메일 발송 오류가 나오는 이유는 아이피에 접속할수 없기때문입니다.
당신의 메일 서버 아이피에서 외부 접근이 가능한지 확인해야합니다.
sorry i wasn’t able to establish an smtp connection
방화벽이라던지 외부 차단 서비스가 있다면 이부분에 대해 세팅을 하여야합니다.
리눅스 사용자라면 iptable과 firewalld 세팅을 해야하며 SELINUX 접근 권한을 확인하여야합니다.

SMTP 서버와 도메인 DNS MX,A 레코드가 정상적으로 되어져있는지도 확인해보세요.
위의 제 경우에는 외부 접근이 되지않아 메일 오류와 함께 반송되었습니다.
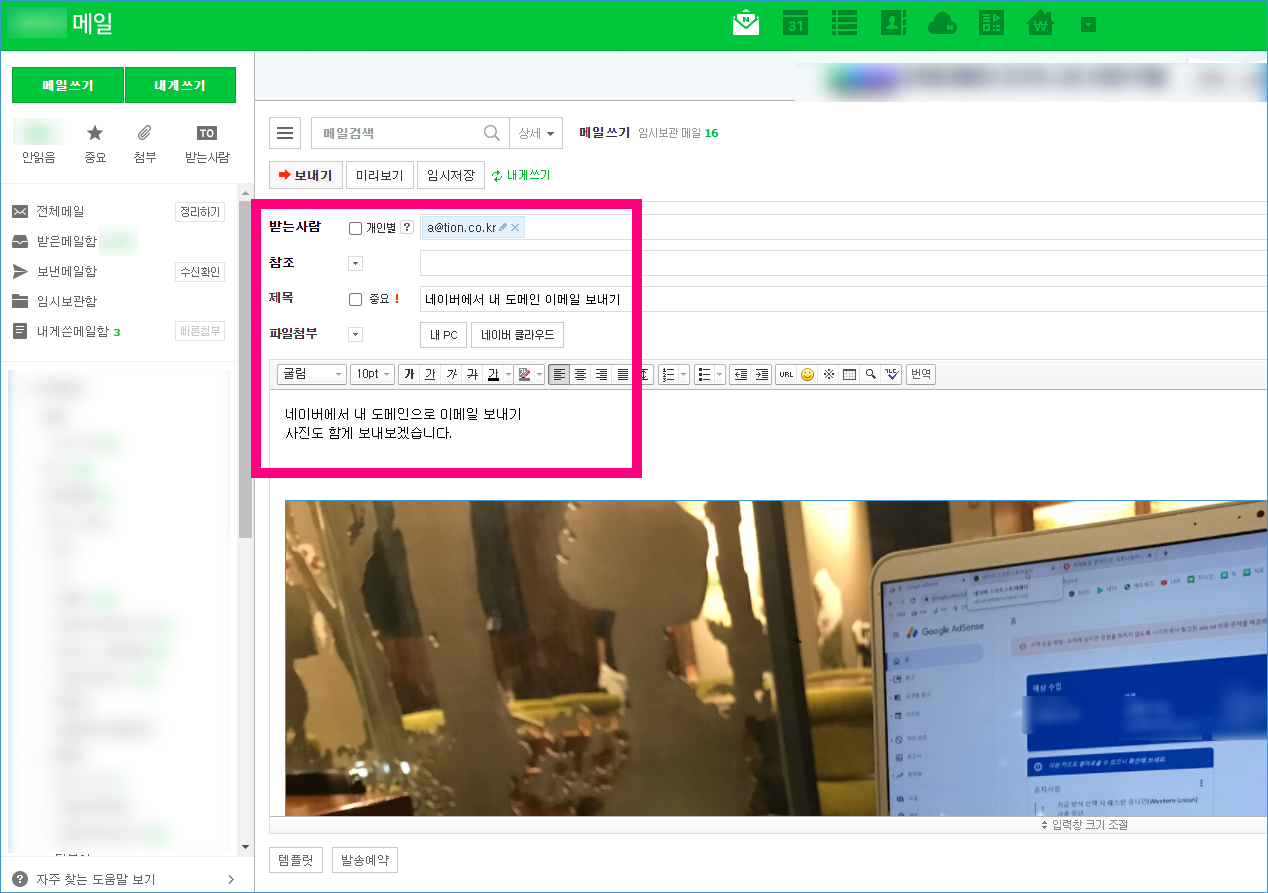
이메일 만드는법 – 제가 직접 사용하는 메일입니다
[a]99999[/a]
제가 운영하고 있는 tion.kr 도메인을 이용하여 이메일 주소를 만들었습니다.
우선 동작하는 부분을 보여드리고 만드는 방법은 아랫족에 어떻게 만드는지 알려드리겠습니다.
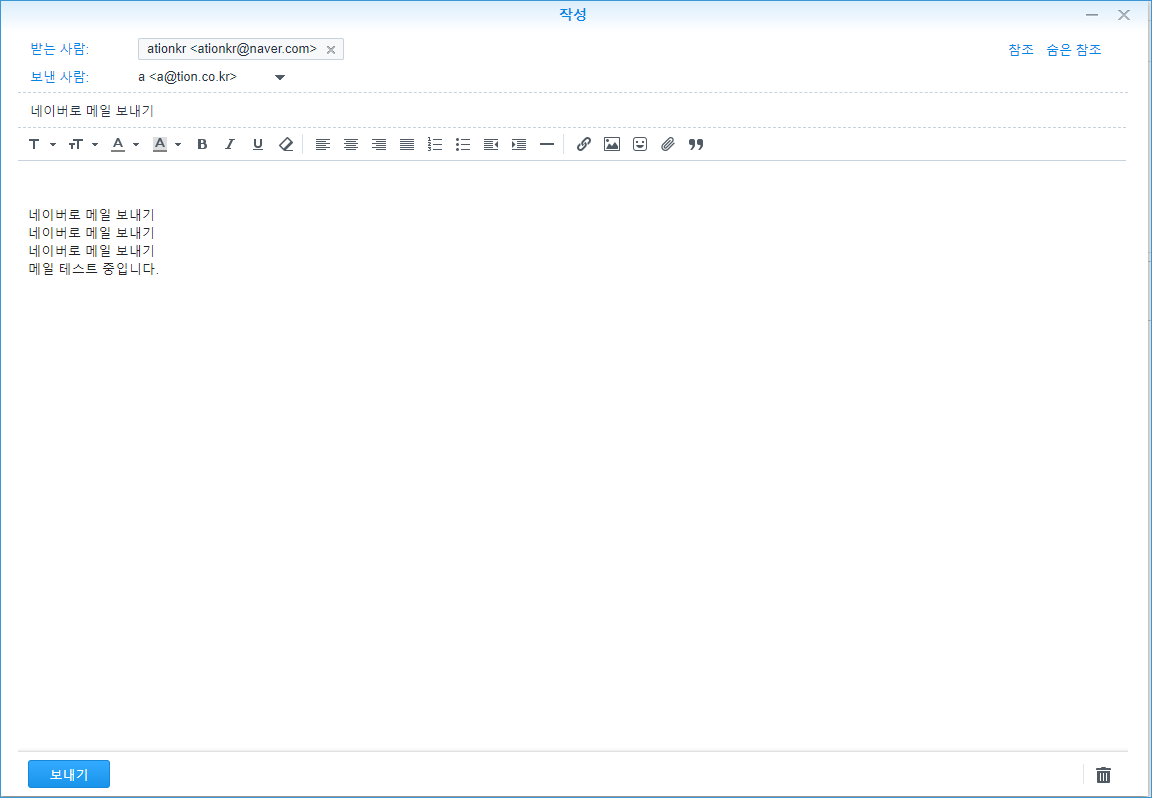
우선 네이버쪽으로 메일을 발송을 해보겠습니다.
개인 도메인 메일 -> 네이버 메일 (단순 TEXT문장)
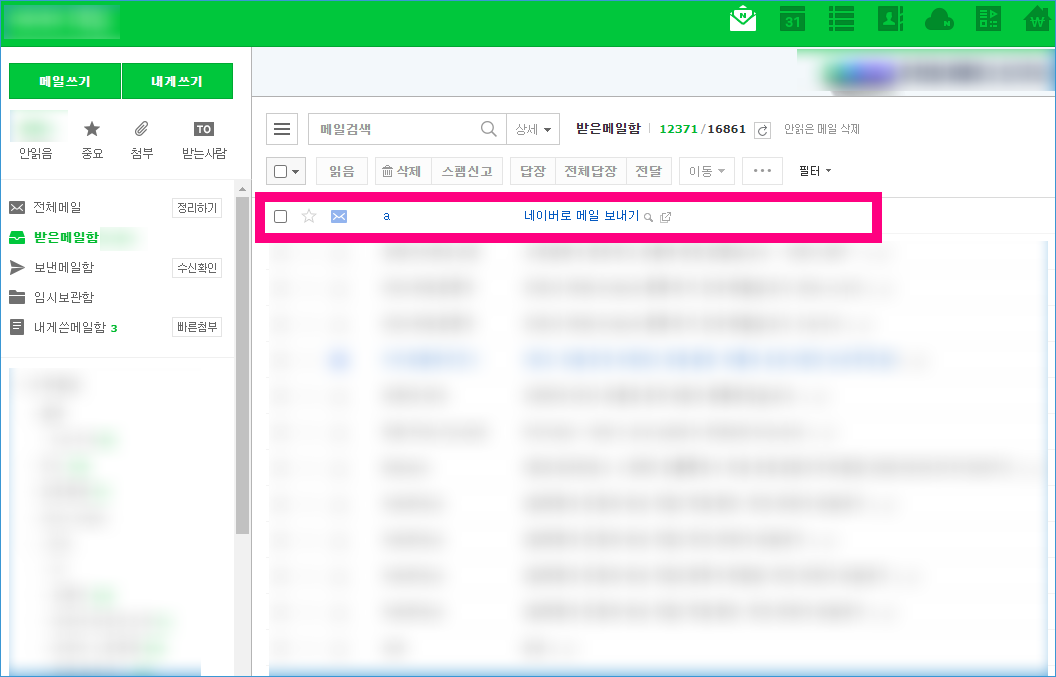
네이버에 로그인하여 메일을 확인해보니
메일서버에서 발송한 테스트 메일이 잘 전달되었습니다.
[a]17070[/a]
네이버 메일 -> 개인 도메인 메일 (이미지 포함)
이번에는 반대로 네이버 메일을 개인 도메인 메일로 발송해보았습니다.

메일이 발송되고 바로 개인도메인 메일함에 잘 도착하였습니다.
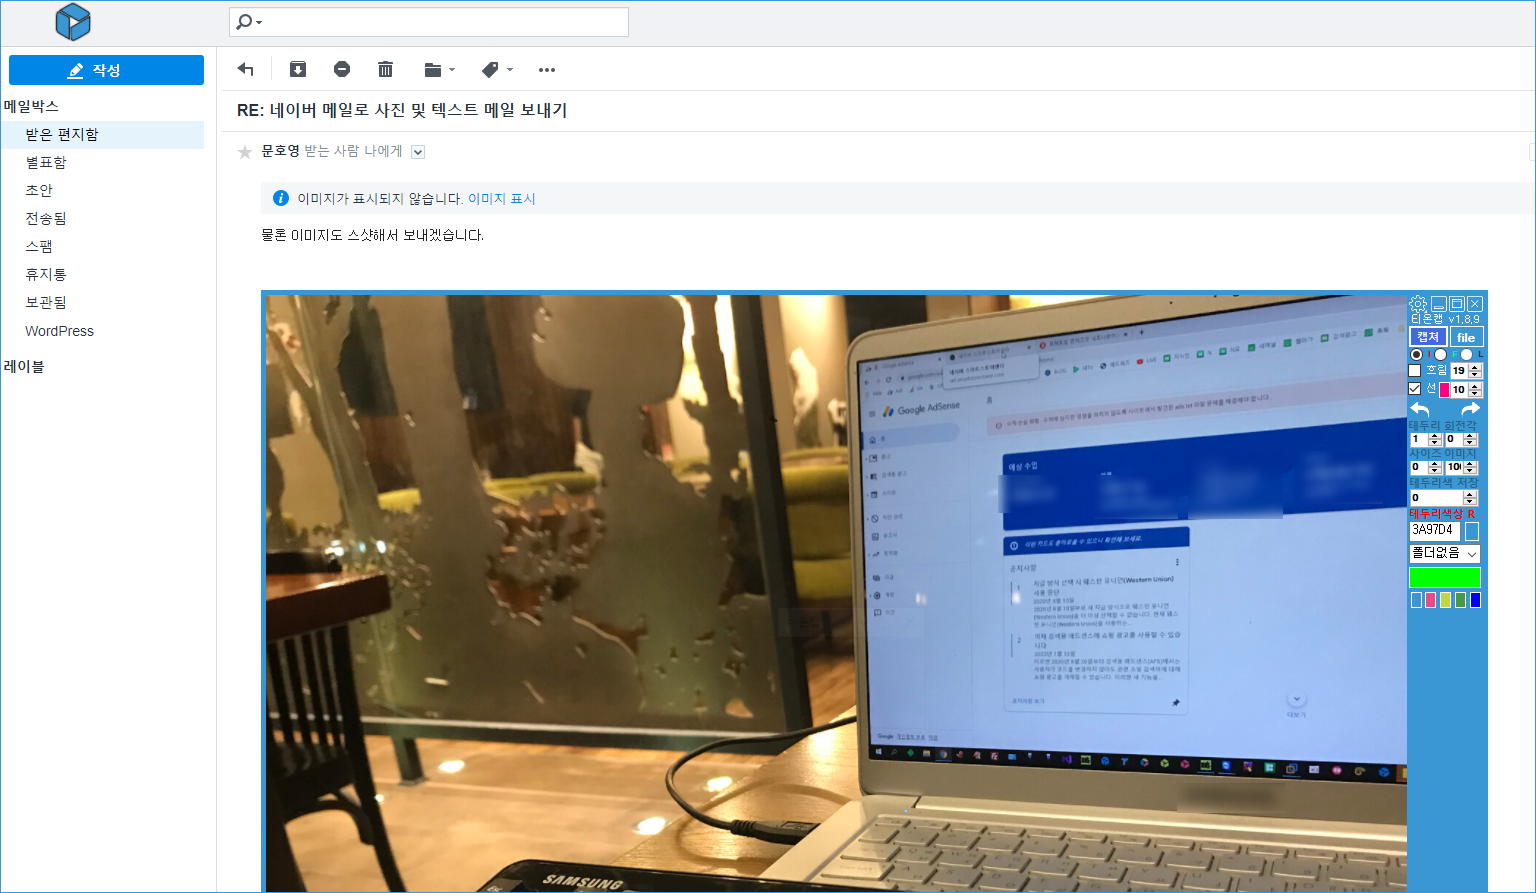
역시 사진을 포함하여 네이버측으로 메일을 보내보겠습니다.
개인 도메인 메일 -> 네이버 메일 (이미지 포함)
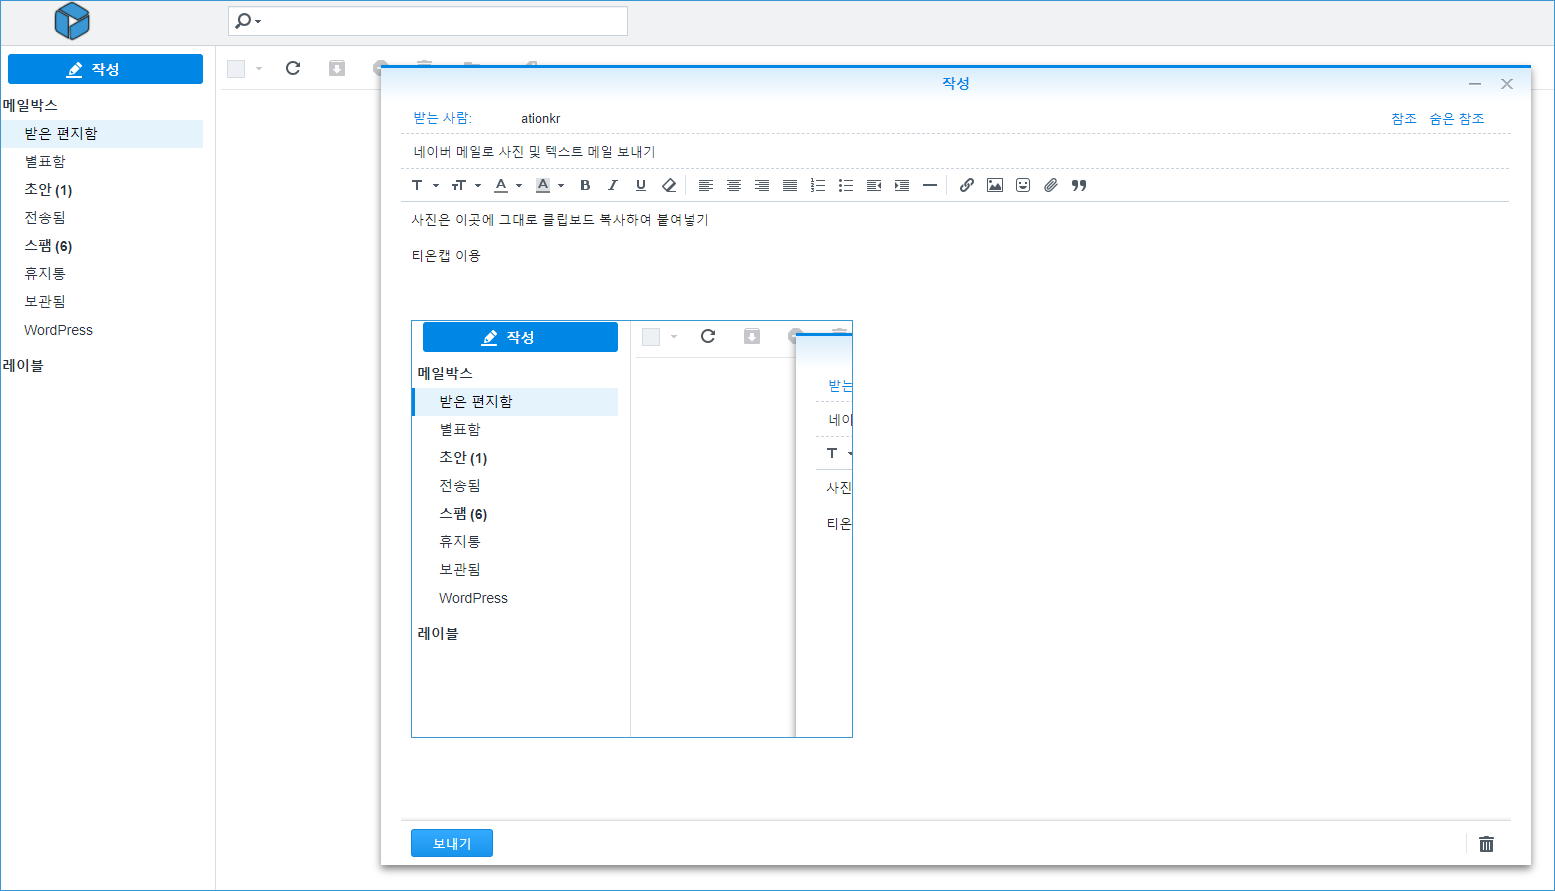
티온캡 스크린샷 프로그램을 이용하였으며 메일 플러스에서 클립보드 이미지를 그대로 복사 붙여넣기 할 수 있습니다.
이미지가 첨부파일로 포함되어져 메일이 잘 도착하였습니다.

[a]99999[/a]
메일을 보내고 받는 부분 모두 잘 되었습니다.
1 . 시놀러지 NAS 장비가 필요합니다.

2 . 메일 PLUS 서버설치와 메일 PLUS 클라이언트를 설치합니다.

3 . 개인도메인을 구입합니다. (이번글에서는 TION.KR 도메인을 사용하였습니다)
시놀러지 NAS는 추천장비는 따로 있지만 개별로 저렴한 모델을 구입하셔도 같은 서비스를 이용할수 있습니다.
쿠팡에서 30만원대에 2베이 모델과 4TB 이정도면 충분히 누릴수있습니다.
[a]개인나스장비[/a]
하드는 1TB~2TB 작게 장착하셔도 되니 용량때문에 부담을 갖을필요는 없습니다.
1TB만 하더라도 메일 용량 남습니다. 모자르면 백업하고 싹 지우면됩니다.
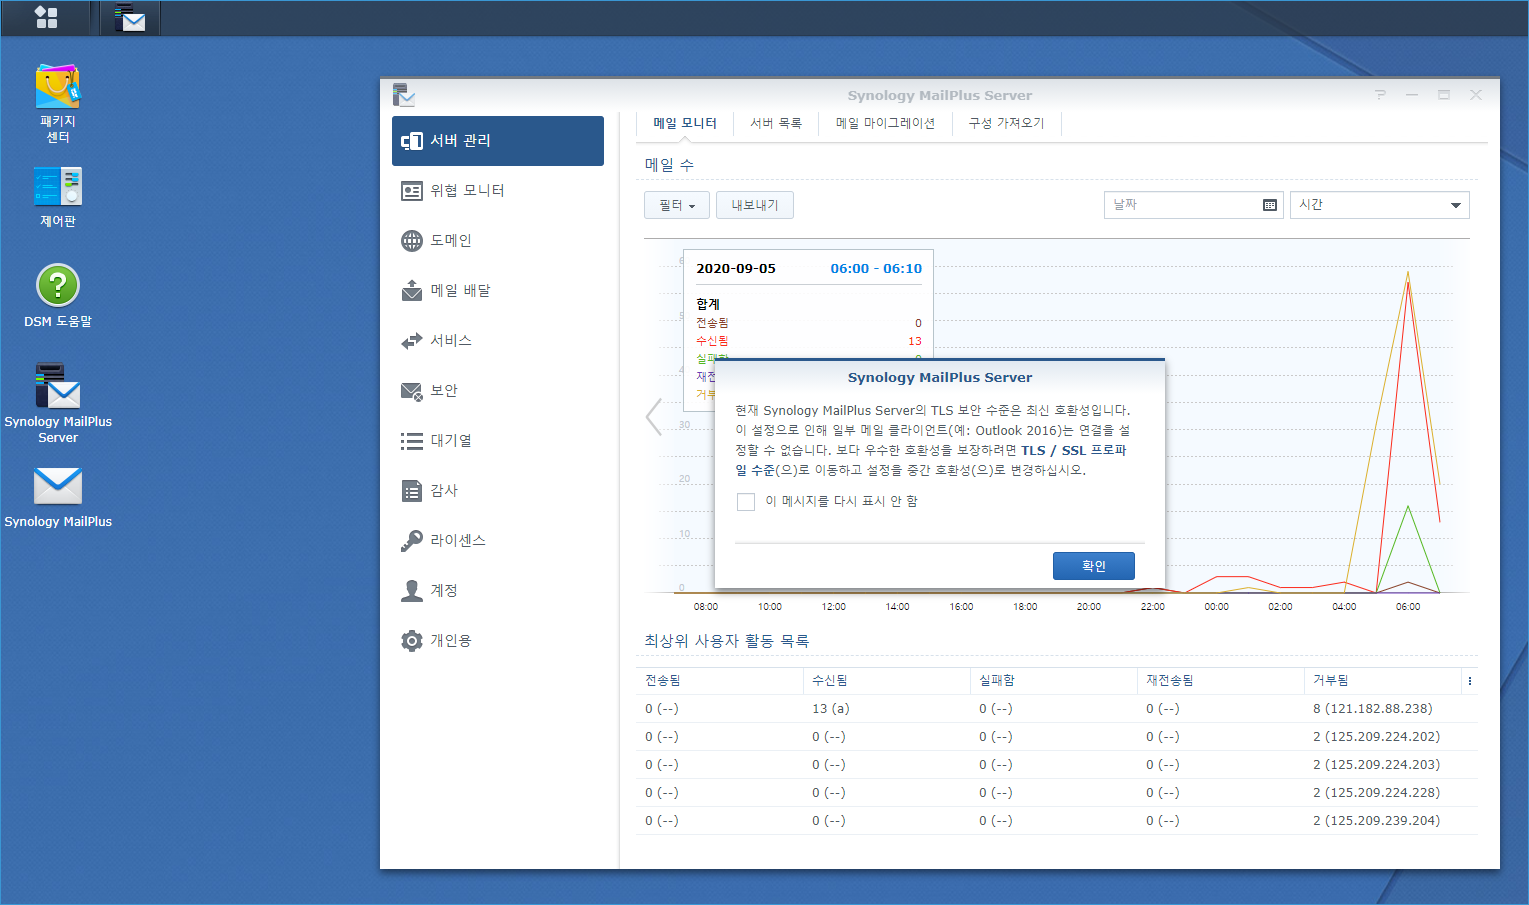
메일 플러스서버와 클라이언트는 시놀러지 나스에서 제공되는 유료 패키지입니다.
[a]99998[/a]
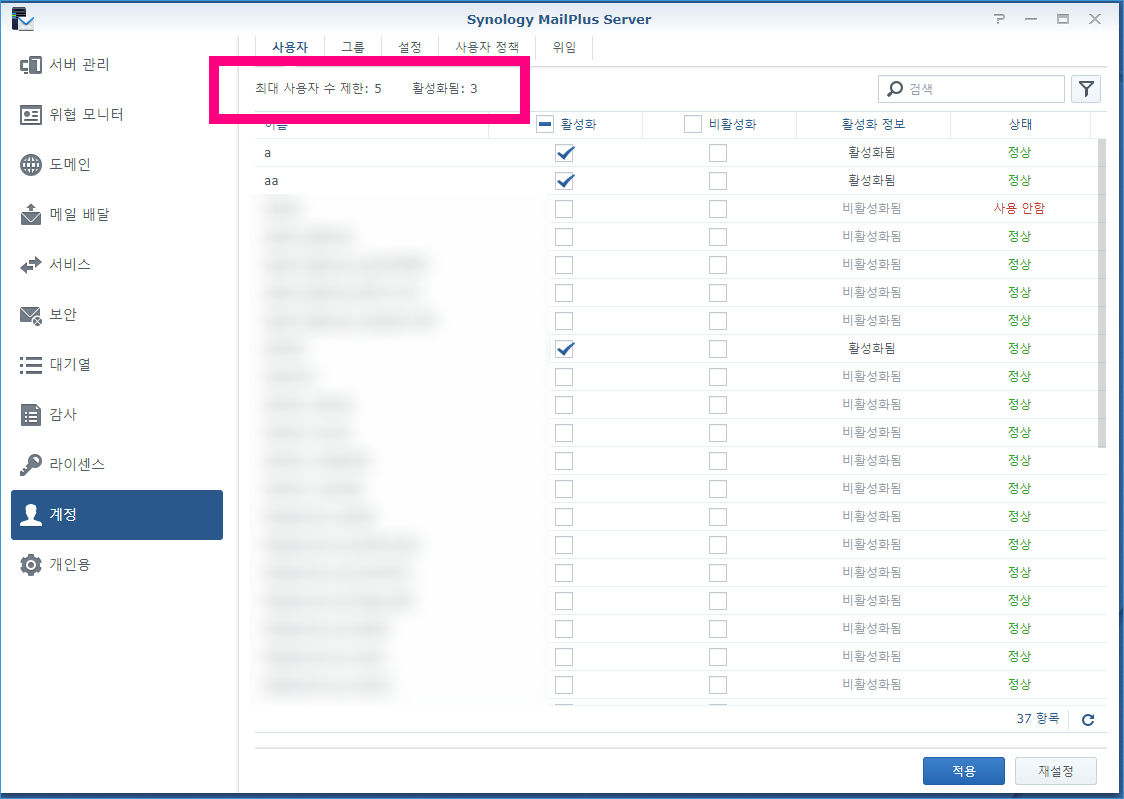
도메인 2개와 메일 아이디 5개까지는 무료이지만 그이상부터는 라이선스 비용을 지불하여야합니다.
개인적으로 사용하는분들은 계정이 많이 필요없으니 그냥 사용하실수 있습니다.
개인 도메인을 구입하였다면 DNS 설정 (MX, A, TXT 레코드를 등록해줍니다)
MX 레코드에는 메일서버 mail.tion.kr 을 입력하면되며
A 레코드에 @ (아무것도없는서브도메인) 에는 mail.tion.kr 서버에 대한 아이피 값을 입력합니다.
TXT 값으로 화이트도메인을 설정해야하므로 KISA 의 레코드 서비스를 이용하여 화이트도메인으로구성합니다.
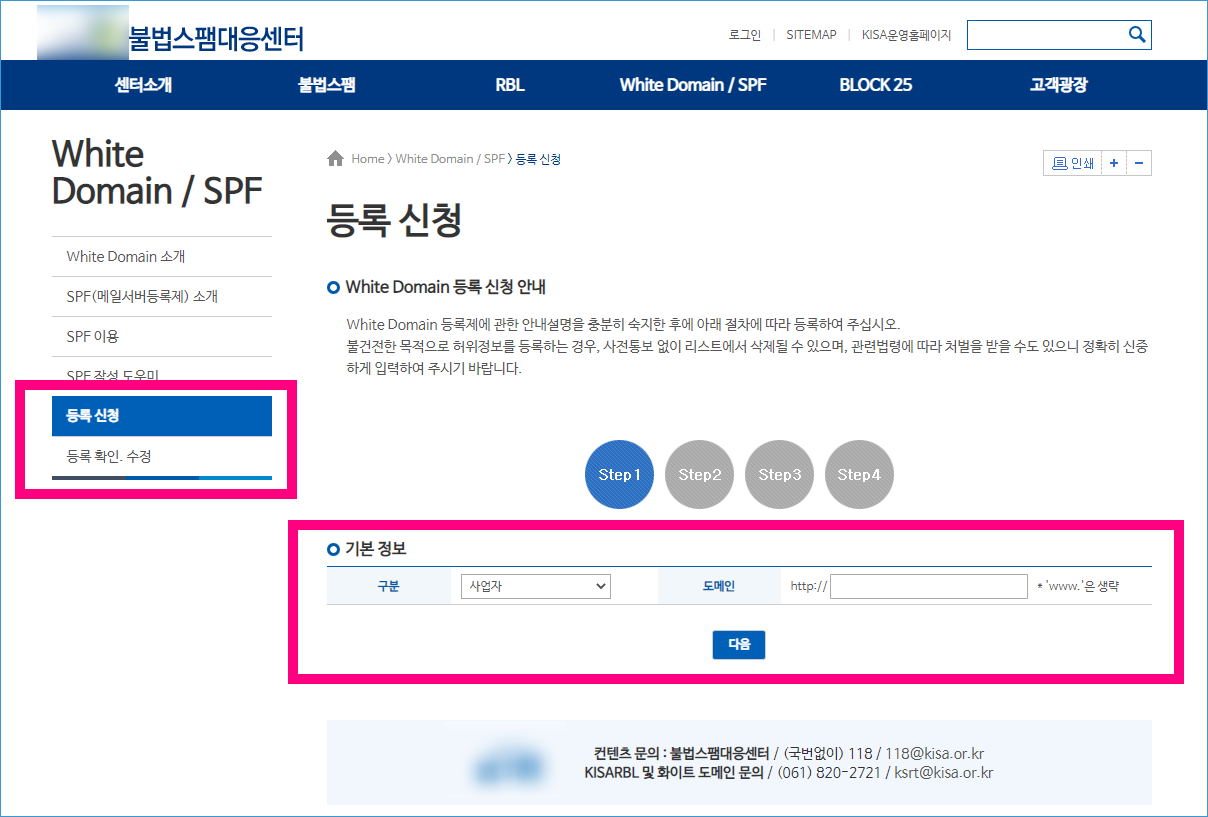
이 모든과정을 마치고나면 여러분들도 개인 도메인으로 개인 메일을 만들수 있게됩니다.
저는 그전에 사용하였던 a@tion.kr (주메일주소)와 aa@tion.kr (세금계산서발행 메일) 을 사용했기에 그대로 쓰면될듯하네요.
저처럼 구분지어서 사용하시는 분들에게는 개인도메인으로 메일 만드는것을 적극 권해드리고싶습니다.
[a]99999[/a]
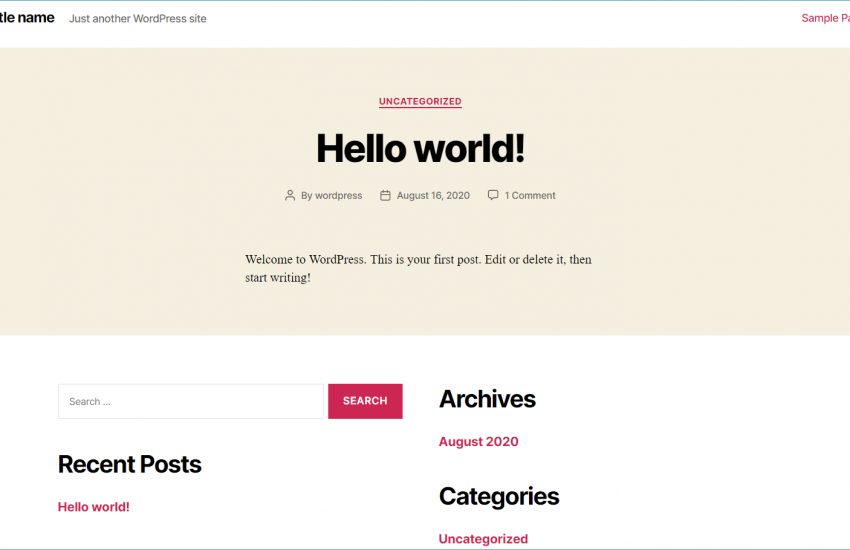
[a]99999[/a]
SELinux 활성화되어져있을경우
워드프레스 폴더에 읽기쓰기 권한을 제공하여야지만 httpd 웹서버가 인식할수있다.
semanage fcontext -a -t httpd_sys_rw_content_t "/var/www/html/wordpress(/.*)?"
이렇게 워드프레스가 설치되어진 폴더 아래 전체를 정규식을 통해 세팅합니다.
다음으로 워드프레스 폴더 전체를 한번 검토하여 파일이 인식하도록 합니다.
restorecon -Rv /var/www/html/wordpress
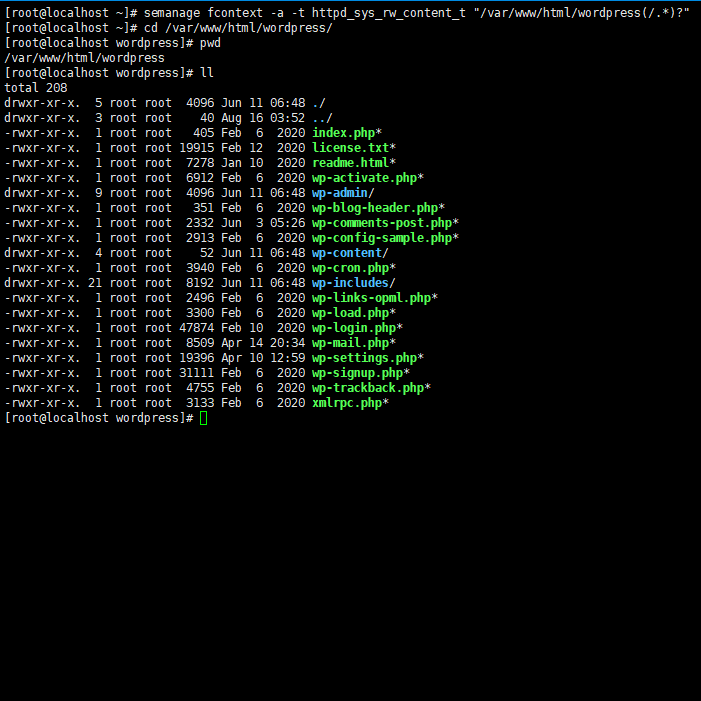
또한 phpmyadmin 에도 권한을 부여하여 phpmyadmin 로그인을 하고 사용자를 만들수 있습니다.
마찬가지로 phpmyadmin이 설치된 폴더를 정규표현직으로 설정합니다
semanage fcontext -a -t httpd_sys_rw_content_t "/var/www/phpMyAdmin(/.*)?"

restorecon -Rv /var/www/phpMyAdmin
phpmyadmin의 경우에는 conf 파일이 httpd 폴더내에 존재하기때문에 한번 전체를 로딩해주어야합니다
[a]99992[/a]
restorecon -Rv /etc/httpd/conf.d
그리고 httpd 웹서버를 재구동해주면 워드프레스와 phpmyadmin 모두 사용가능해집니다.
systemctl restart httpd
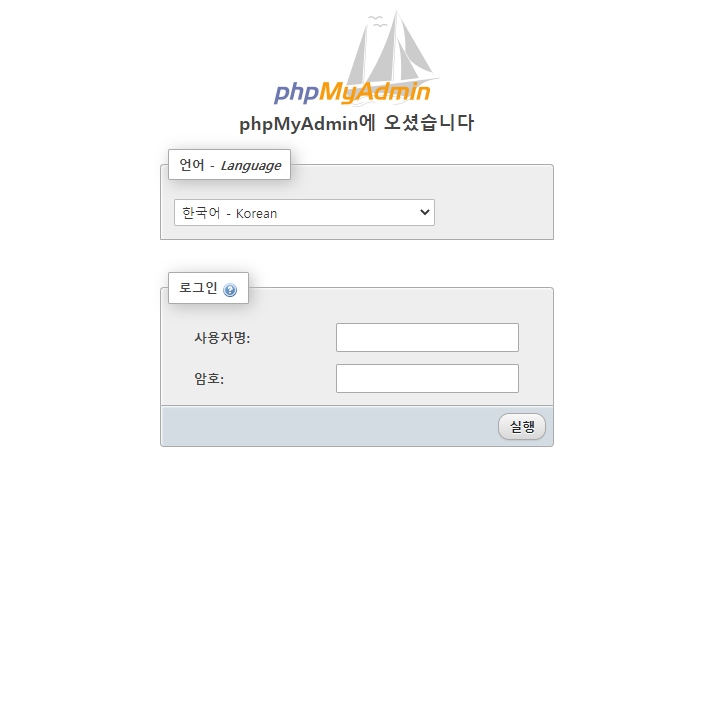
이제 phpmyadmin 에 사용자 설정하고 워드프레스 설치 하면됩니다.
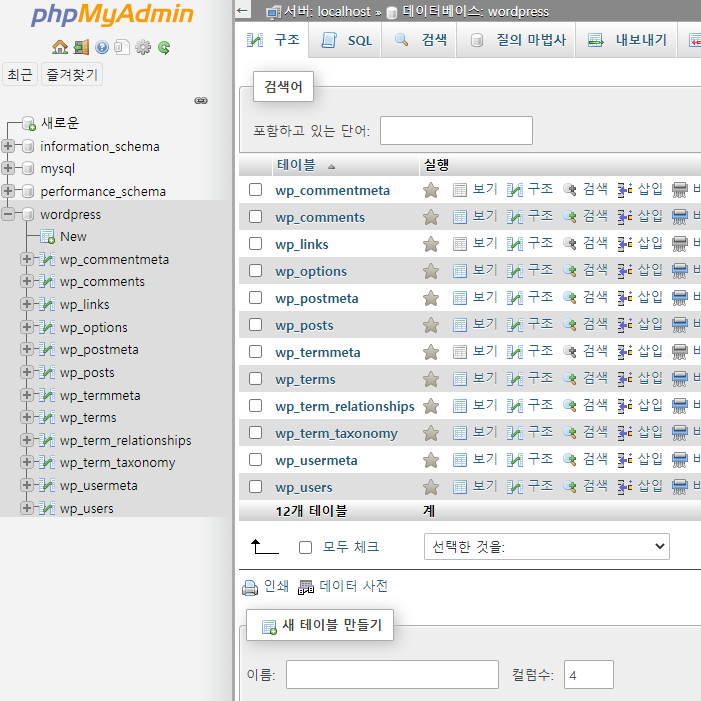
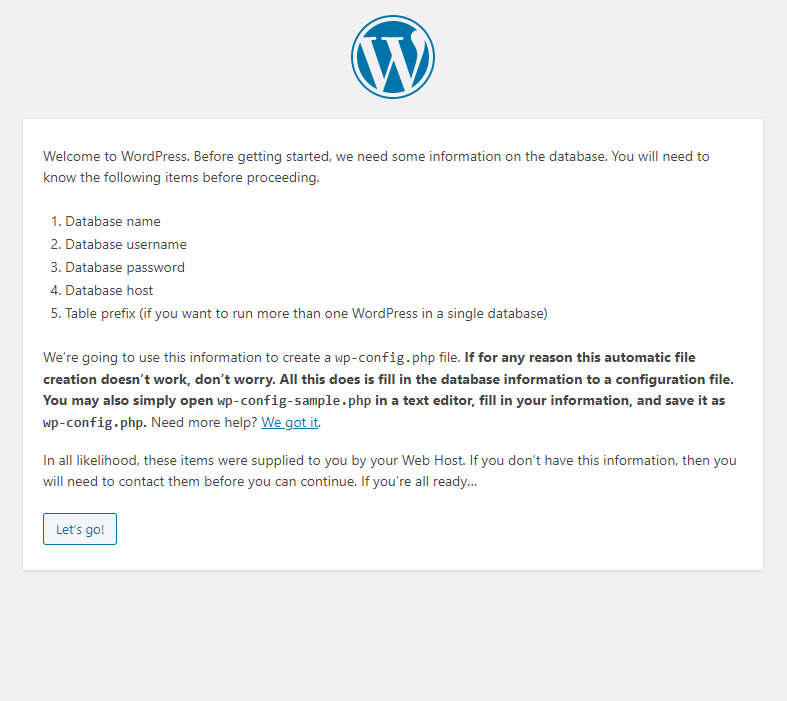
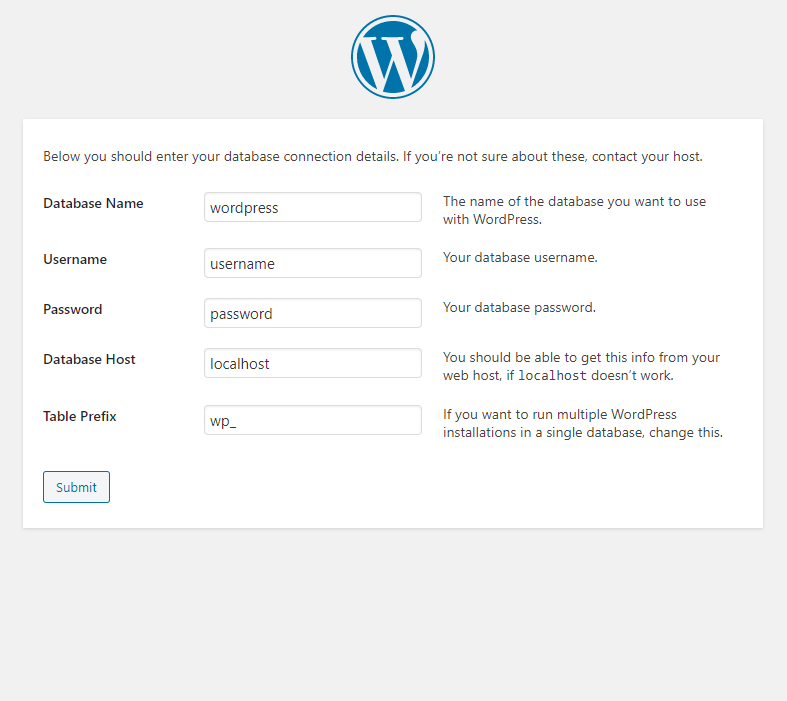


드디어 워드프레스가 설치되었습니다.
모두 성공하셨나요?
[a]99999[/a]
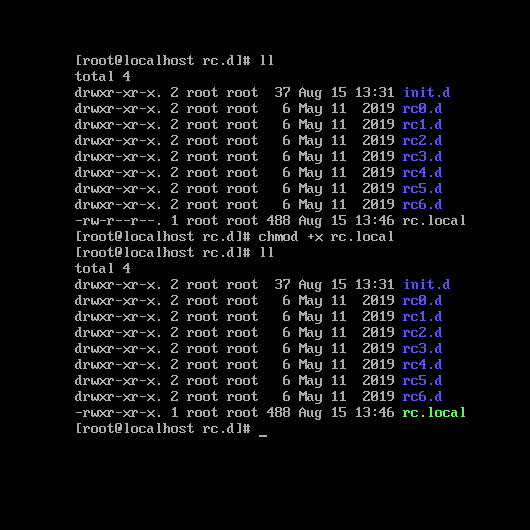
systemctl enable rc-local
The unit files have no installation config (WantedBy, RequiredBy, Also, Alias
settings in the [Install] section, and DefaultInstance for template units).
This means they are not meant to be enabled using systemctl.
Possible reasons for having this kind of units are:
1) A unit may be statically enabled by being symlinked from another unit's
.wants/ or .requires/ directory.
2) A unit's purpose may be to act as a helper for some other unit which has
a requirement dependency on it.
3) A unit may be started when needed via activation (socket, path, timer,
D-Bus, udev, scripted systemctl call, ...).
4) In case of template units, the unit is meant to be enabled with some
instance name specified.
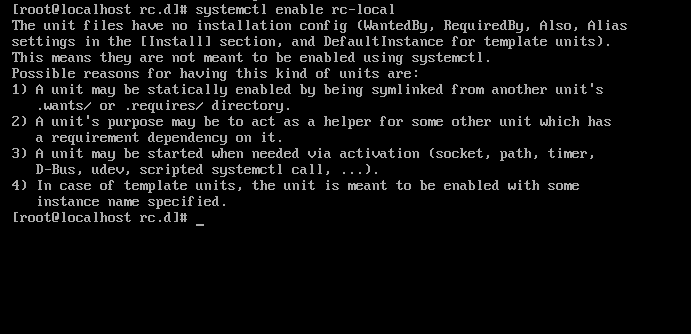
Check!!
/etc/rc.d/rc.local permission
chmod +x /etc/rc.d/rc.local

AND


[Solved] rc-local enable
Thank you 🙂


The server encountered an internal error or misconfiguration and was unable to complete your request.

Please contact the server administrator at a@tion.kr to inform them of the time this error occurred, and the actions you performed just before this error.

More information about this error may be available in the server error log.
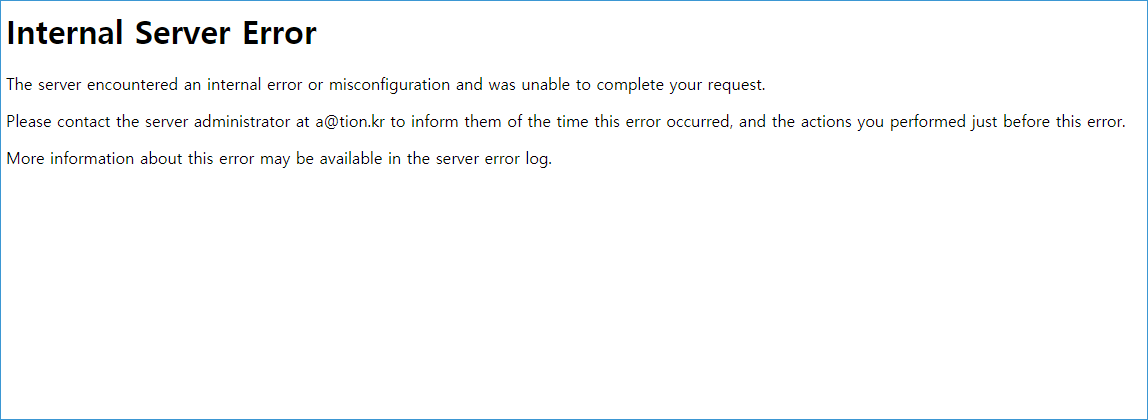
This is how you solve this error.
First.
Your php.conf file edit
vi 15-php.conf
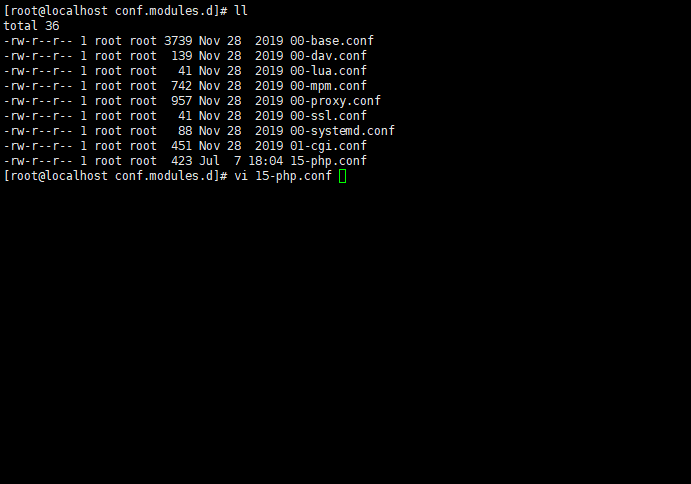
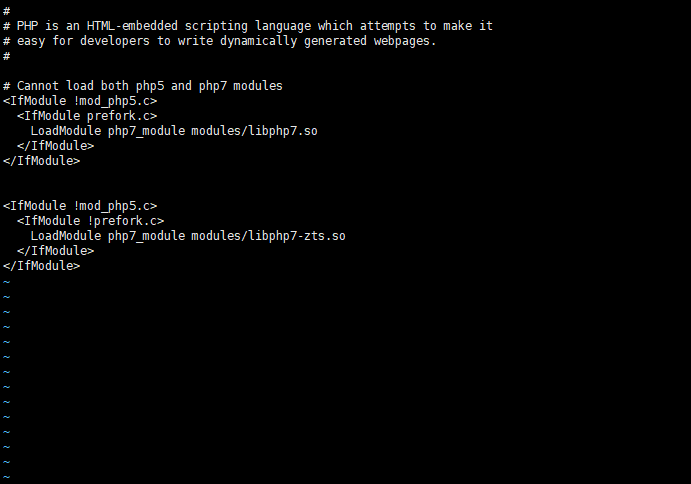
<IfModule !mod_php5.c>
<IfModule prefork.c>
LoadModule php7_module modules/libphp7.so
</IfModule>
</IfModule>


<IfModule !mod_php5.c>
<IfModule !prefork.c>
LoadModule php7_module modules/libphp7-zts.so
</IfModule>
</IfModule>
Second.
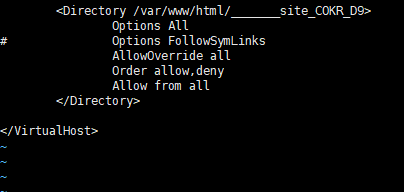
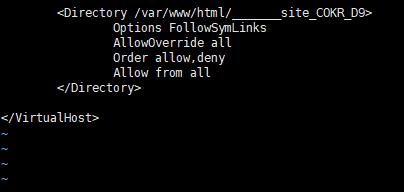
Check AllowOverride all AND Options All in httpd.conf file
vi /etc/httpd/conf/httpd.conf
OR
service httpd restart
Go!!
Use php_value in .haccess file
php_value upload_max_filesize 128M
php_value post_max_size 128M
php_value max_execution_time 500
php_value max_input_time 500

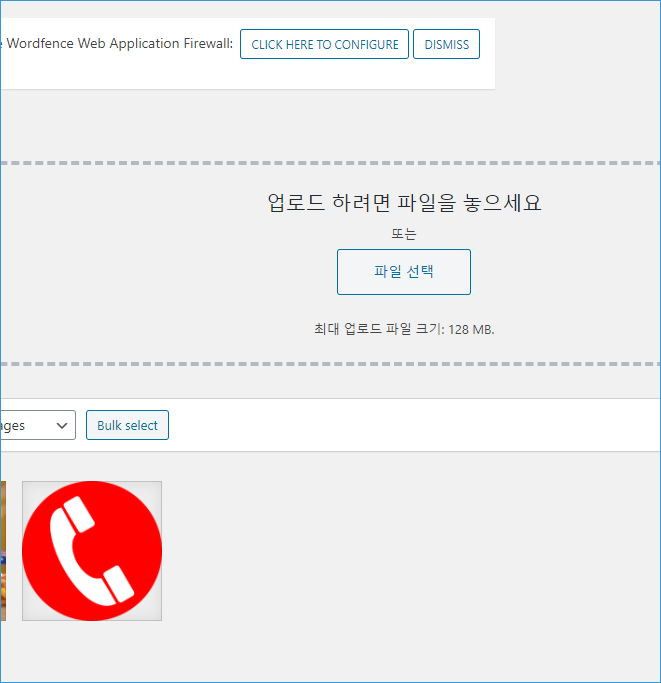
WordPress File Upload Max size 128MB
Good luck to you 🙂


[a]99992[/a]
sed -i 's/mirrorlist/#mirrorlist/g' /etc/yum.repos.d/CentOS-Linux-*
sed -i 's|#baseurl=http://mirror.centos.org|baseurl=http://vault.centos.org|g' /etc/yum.repos.d/CentOS-Linux-*

dnf install https://dl.fedoraproject.org/pub/epel/epel-release-latest-8.noarch.rpm
dnf install https://rpms.remirepo.net/enterprise/remi-release-8.rpm

yum 인스톨해도 진행은 됩니다 (글쓴이는 yum으로 설치)
yum install https://dl.fedoraproject.org/pub/epel/epel-release-latest-8.noarch.rpm
yum install https://rpms.remirepo.net/enterprise/remi-release-8.rpm -y
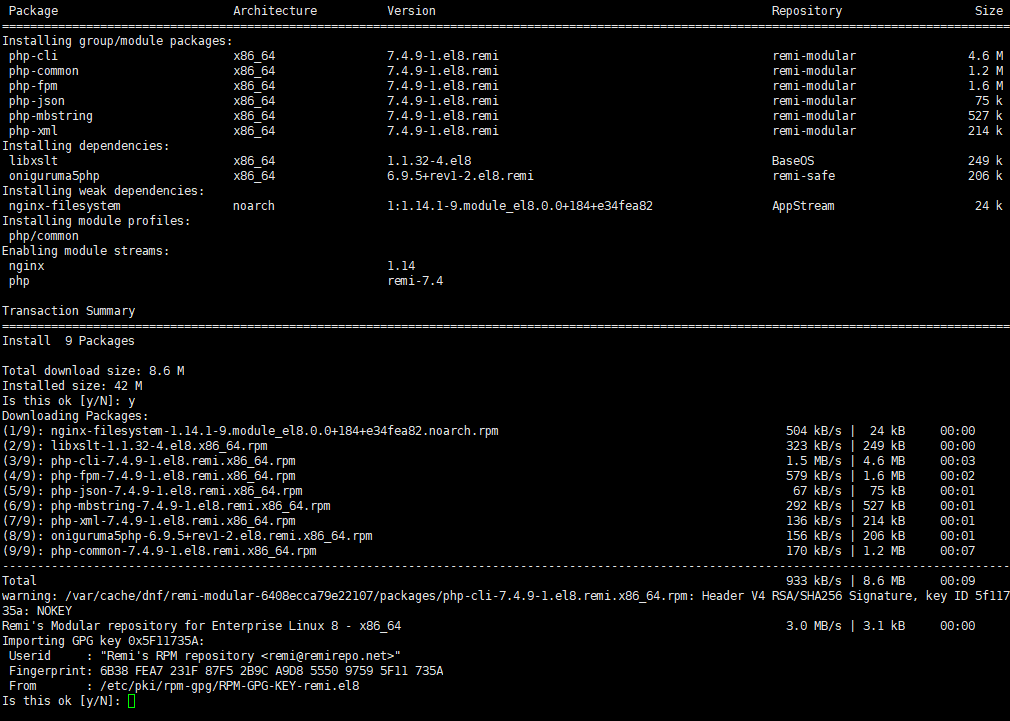
dnf module reset php
dnf module install php:remi-7.4

yum 설치 가능
yum module reset php
yum module install php:remi-7.4
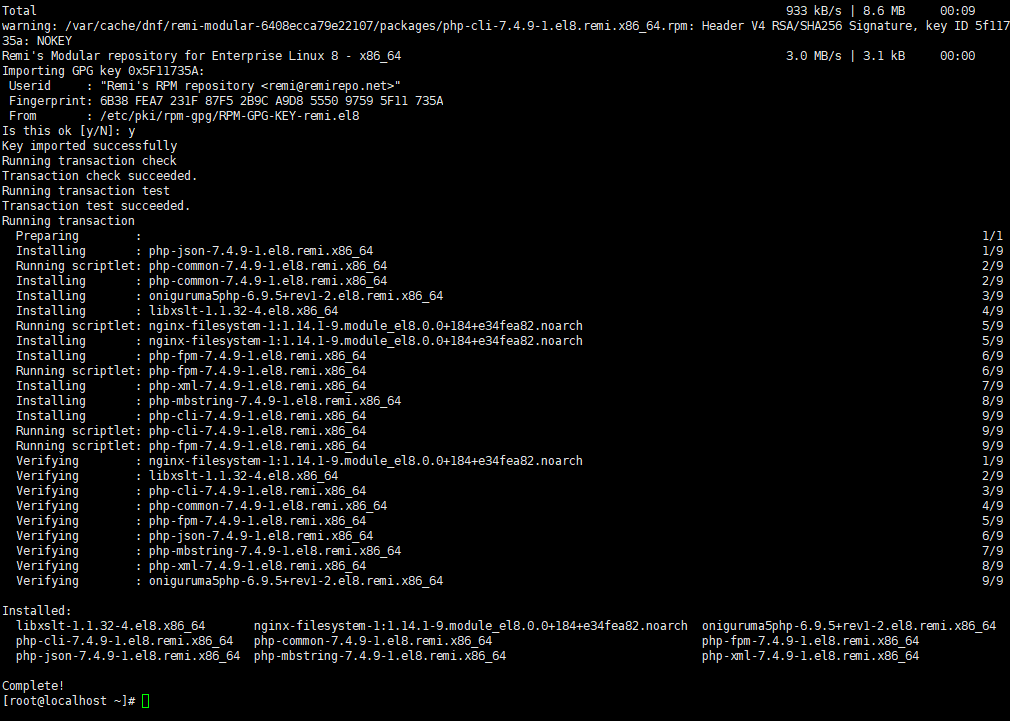
yum update php

http://YourServerAddress/phpinfo.php

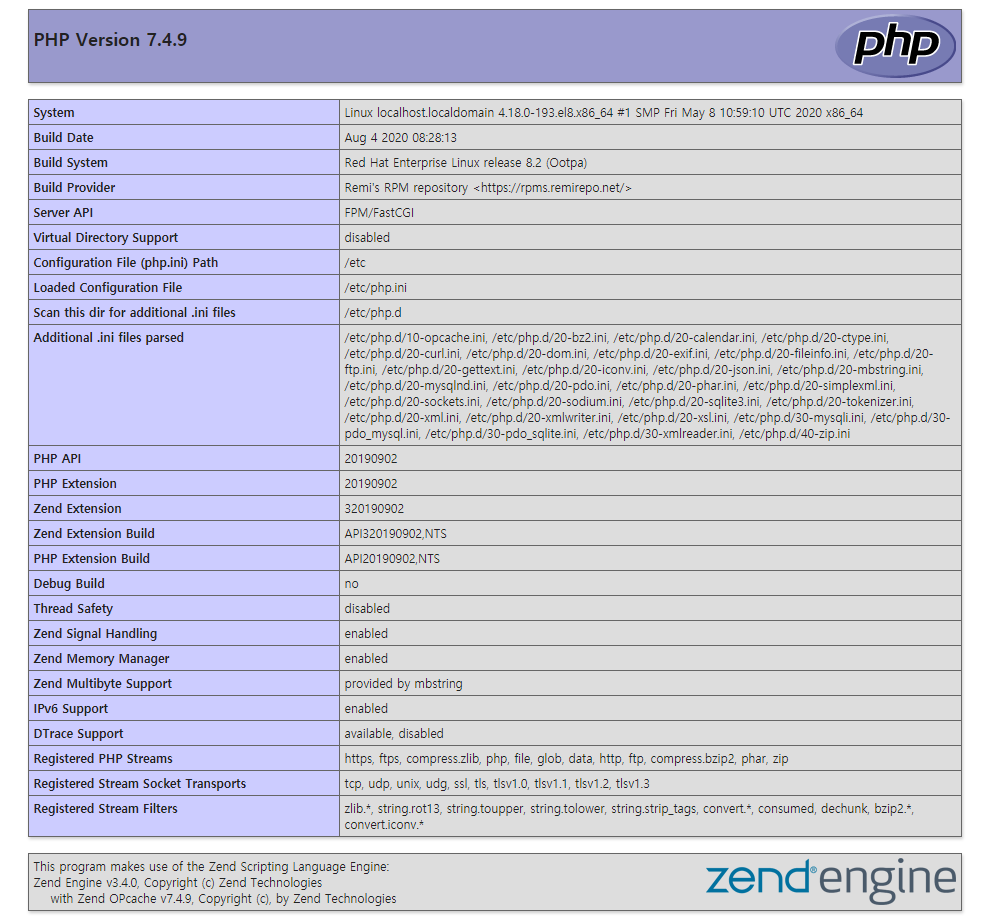
Good Luck To You^^
Thank You!!
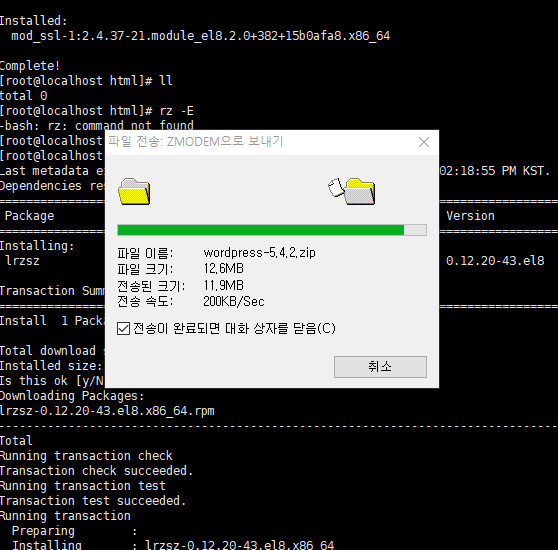

bash: rz: command not found
[a]99992[/a]

yum install lrzsz
SecureCRT File transport UPLOAD and DOWNLOAD
Success!!
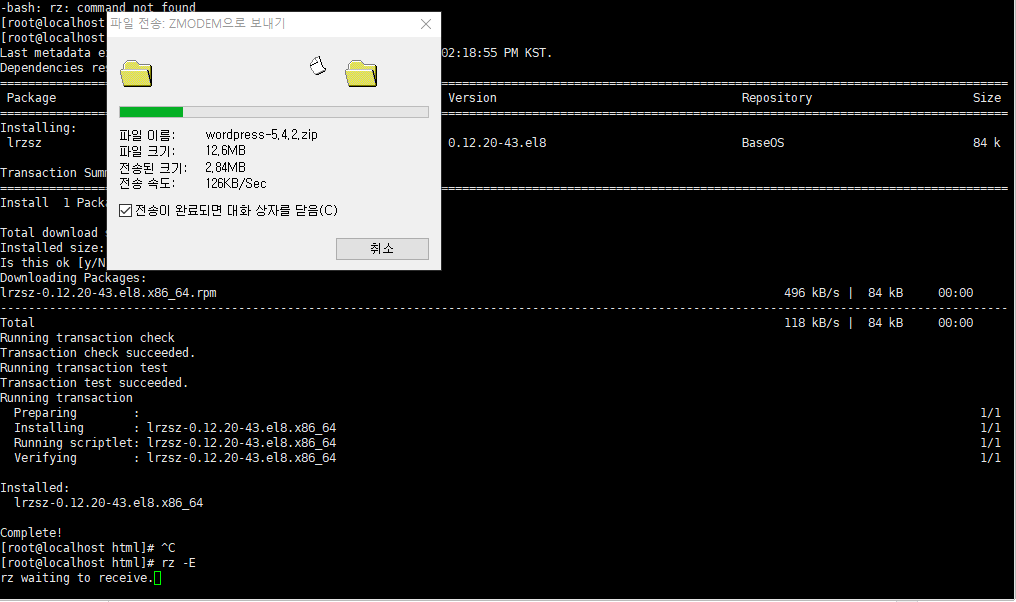
Thank you^^

워드프레스 글 내용중 특정 단어 {99999}를 숏코트로 변환하기 위해서 MySQL 특정 문자를 바꾸게되었습니다.
내용이 많아 일단 명령어부터 입력했습니다.

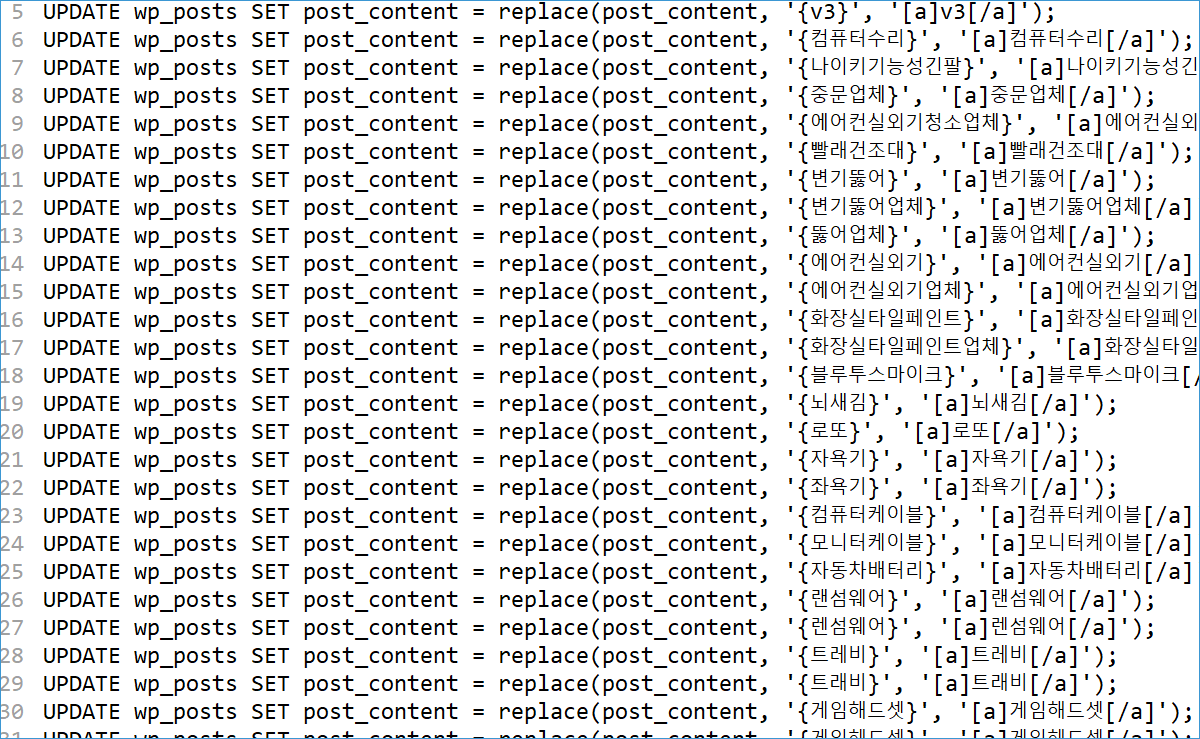
repalce(테이블명, 찾을문장,교체할문장)
전체 다 바꾸고 광고를 본문에 나오도록 하였습니다.
[a]99992[/a]
성공!
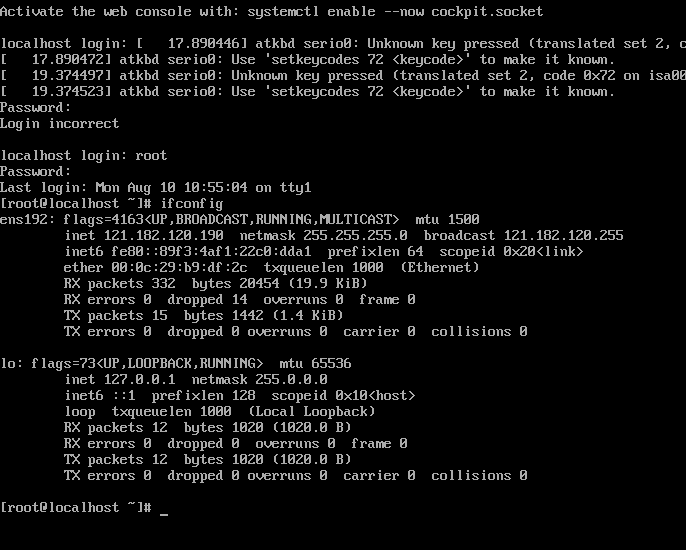
처음에 리눅스를 최소버전으로설치하게되면 네트워크가 자동이 아닌 수동으로 설정을 해주어야합니다
오늘은 센트OS 7 버전에서 (linux centos 7) 최소설치 이후에 처음 네트워크 설정하는 방법을 적어봅니다.
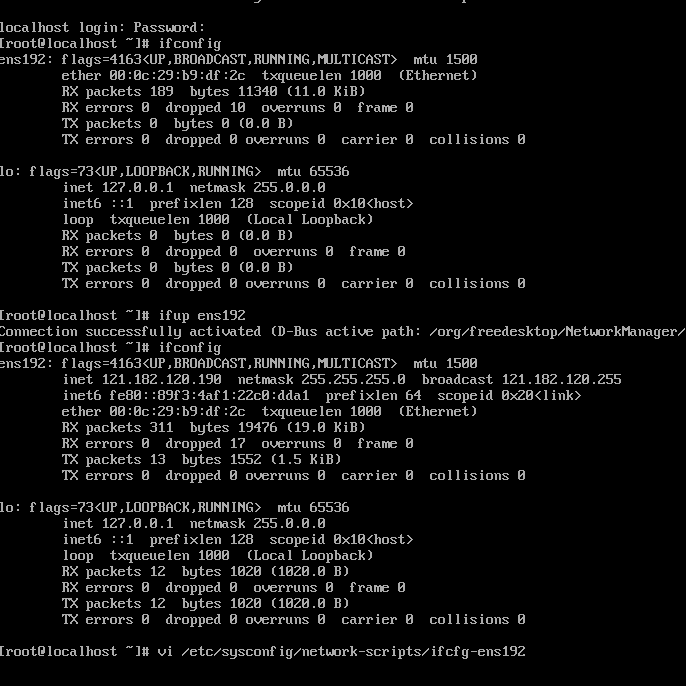
우선 ifconfig 를 이용하여 나의 네트워크 이름을 알아야합니다.
제 경우에는 ens192 로 나와있습니다
그럼 아래처럼 ifup 명령어로 네트워크를 활성화 시킬수 있습니다
ifup ens192
이제 활성화가 되었으니 아이피가 잡히게됩니다

다음번으로 해야할 부분은
VM을 재부팅 할 경우 다시 네트워크를 자동으로 활성화해야합니다

vi /etc/sysconfig/network-scripts/ifcfg-ens192
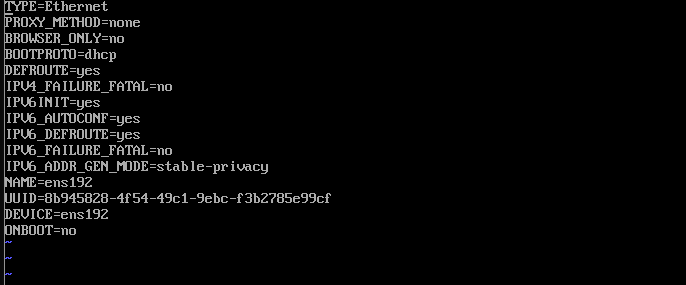
라고 입력하고 ONBOOT=no 이곳을 ONBOOT=yes 로 바꾸면됩니다.
그리고 재부팅하면 자동으로 네트워크가 활성화됩니다.
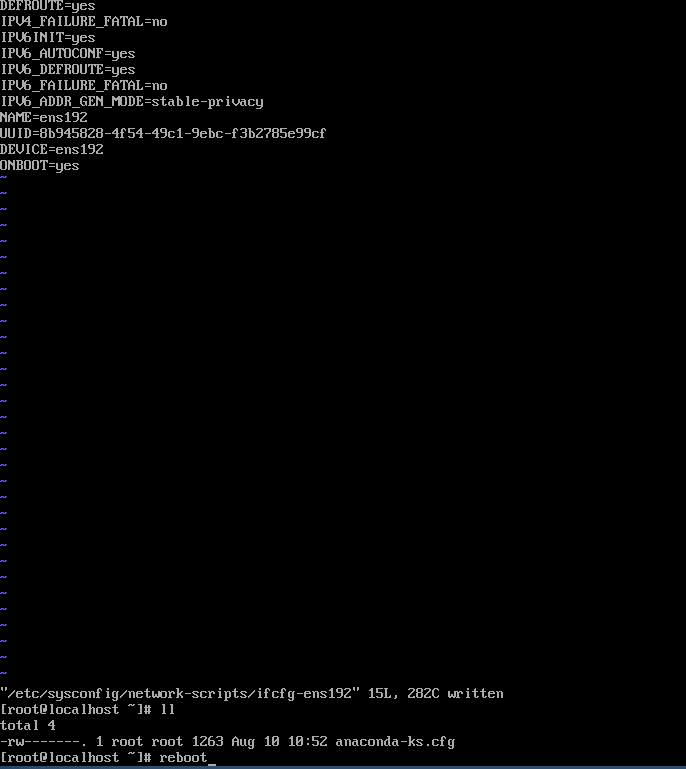
CentOS 7, CentOS8 모두 같은 방법으로 해결됩니다.

![[solved] wordpress plugin ftp access connect error 63 [solved] wordpress plugin ftp access connect error](https://vlog.tion.co.kr/wp-content/uploads/2020/07/269-557x550.png)
![[solved] wordpress plugin ftp access connect error 64 개인서버구축](https://vlog.tion.co.kr/wp-content/uploads/2020/07/269.png)
[solved]
SELinux disabled!!!
GOOD JOB!! Thank You^^
FTP 연결 문제는 여러가지가 있습니다.
예전에 이미 올려놓은 글이 있는데 그 글을 확인하셔도 됩니다.
간단하게 SELinux 를 Disabled 로 바꿔주시고 서버를 재부팅하면 바로 해결됩니다.
![[solved] wordpress plugin ftp access connect error 65 개인서버구축](https://vlog.tion.co.kr/wp-content/uploads/2020/07/820.png)
If FTP server is not running, please run FTP server first.
Other firewall ports should be checked.
service vsftpd start
이제 시작할때마다 다시 자동으로 켜지도록 시스템에 등록합니다
systemctl enable vsftpd
SELinux 설정부터 사용안함으로 바꾸셔야합니다
vi /etc/sysconfig/selinux
![[solved] wordpress plugin ftp access connect error 66 개인서버구축](https://vlog.tion.co.kr/wp-content/uploads/2018/09/948.png)
AND REBOOT!!
더 자세한 정보는 SELinux Disabled 설정 글을 읽어보세요
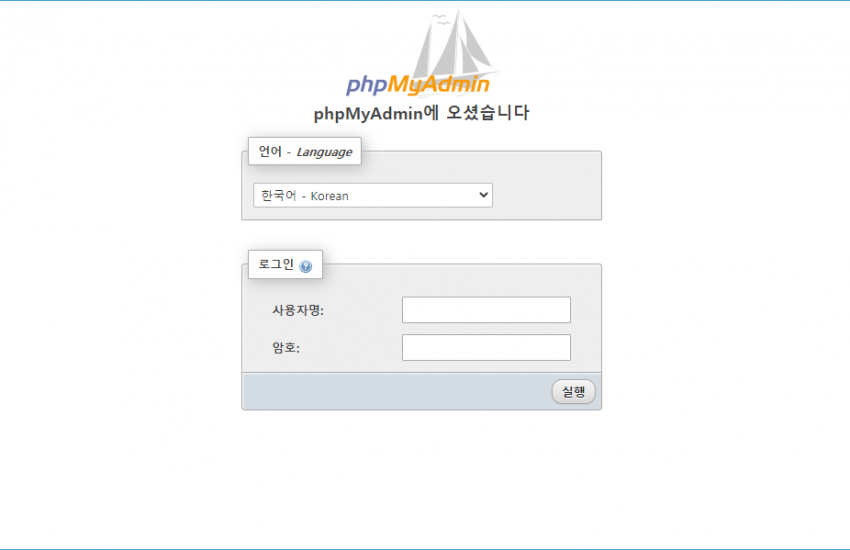
centos 8 phpmyadmin 은 별도로 다운받아 설치를 해야한다.
사이트에 들어가서 가장 최신버전 혹은 자신의 php와 mysql 버전에 맞춰서 다운받는다.
최신버전을 이미 설치한 상태라면 phpmyadmin 역시 최신버전으로 다운받는다.
아래 순서에 따라서 설치를 하면 여러분들이 원하는 최신 버전으로 설치 가능합니다.
최신버전이 매번 latest 가 아닌 파일명으로 업데이트 하니 글을 매번 수정하게되는군요 (2022-11-23일 수정)
혹시라도 2023년 2024년에 이 글을 보는 분들은 아래와 버전이 조금 다를 수 있습니다.
phpMyAdmin의 경우에는 최신 버전을 설치해도 괜찮기때문에 안정적인 버전을 따지지마시고 그냥 최신 버전을 다운받아 사용하면 됩니다. phpMyAdmin은 모듈이 아닌 php 프로그래밍으로 웹상태에서 동작하는거라 버전이 높을수록 오히려 더 친화적입니다.
https://www.phpmyadmin.net/downloads/
| phpMyAdmin-5.2.0-all-languages.zip | 13.5 MB | [PGP] [SHA256] |
| phpMyAdmin-5.2.0-all-languages.tar.gz | 11.9 MB | [PGP] [SHA256] |
| phpMyAdmin-5.2.0-all-languages.tar.xz | 6.8 MB | [PGP] [SHA256] |
| phpMyAdmin-5.2.0-english.tar.gz | 7.4 MB | [PGP] [SHA256] |
| phpMyAdmin-5.2.0-english.tar.xz | 4.8 MB | [PGP] [SHA256] |
| phpMyAdmin-5.2.0-english.zip | 9.0 MB | [PGP] [SHA256] |
| phpMyAdmin-5.2.0-source.tar.xz | 17.3 MB | [PGP] [SHA256] |

다운로드 주소를 확인하고 wget 으로 다운받아도 되며 따로 pc에서 다운받고 ftp등 업로드 하여 설치를 하여도 된다. 각자 쉬운방법으로 서버에 우선 업로드한다. 5.0.2 버전이 최신이라 이 버전으로 다운로드
cd /var/www/html
wget https://files.phpmyadmin.net/phpMyAdmin/5.2.0/phpMyAdmin-5.2.0-all-languages.zip
wget이 없을경우 yum install wget 으로 설치
yum명령어로 최신버전으로 OS상태를 맞춥니다.
가끔 php 버전이 오래된 버전이라서 그 모듈버전때문에 phpMyAdmin 에서 오류가 나는 경우가 있습니다. 이때에는 서버를 업데이트 해주어야 합니다.
yum update -y
dnf install httpd mariadb-server php php-cli php-json php-mbstring php-pdo php-pecl-zip php-mysqlnd -y
yum install httpd mariadb-server php php-cli php-json php-mbstring php-pdo php-pecl-zip php-mysqlnd -y
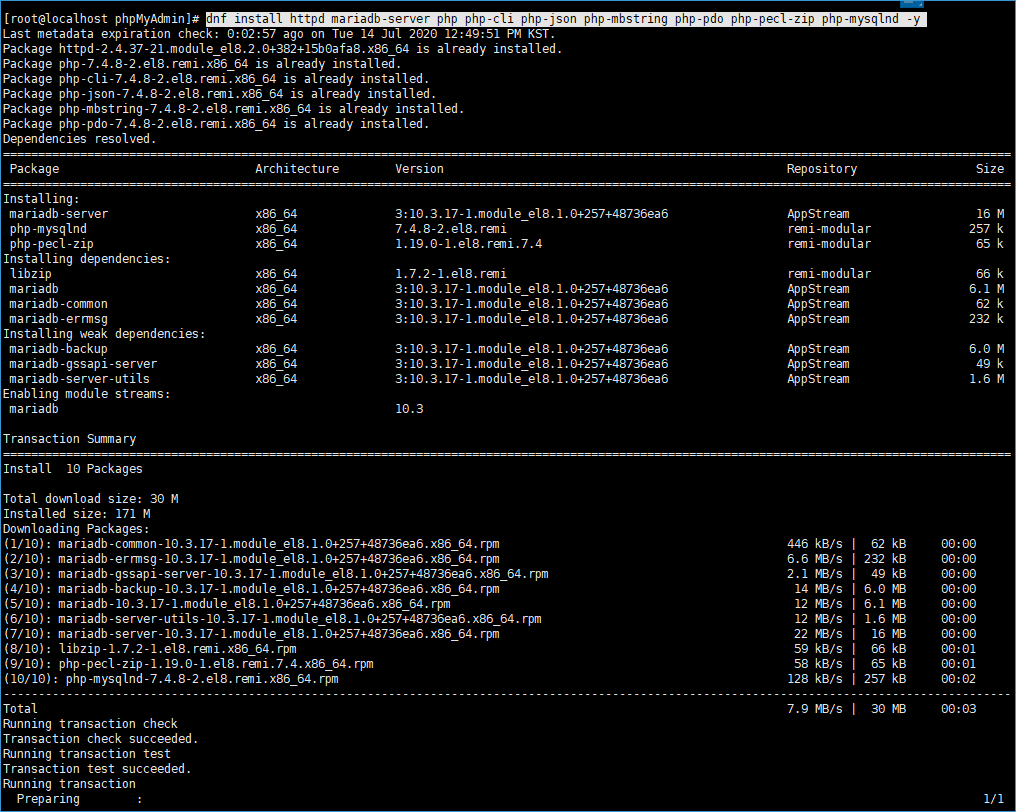

데이터베이스 접속 아이디와 암호는 처음에 한번만 세팅하면됩니다.
이때 매우 중요한 부분이므로 암호를 외부에 노출이 안되도록 주의하세요
systemctl start mysqld
systemctl enable mysqld

mysql_secure_installation

MariaDB설치되는경우는 아래처럼
systemctl start mariadb
systemctl enable mariadb
mysql_secure_installation
Set root password? [Y/n] Y
New password:
Re-enter new password:
Password updated successfully!

Remove anonymous users? [Y/n] Y
Disallow root login remotely? [Y/n] Y
Remove test database and access to it? [Y/n] Y
Reload privilege tables now? [Y/n] Y
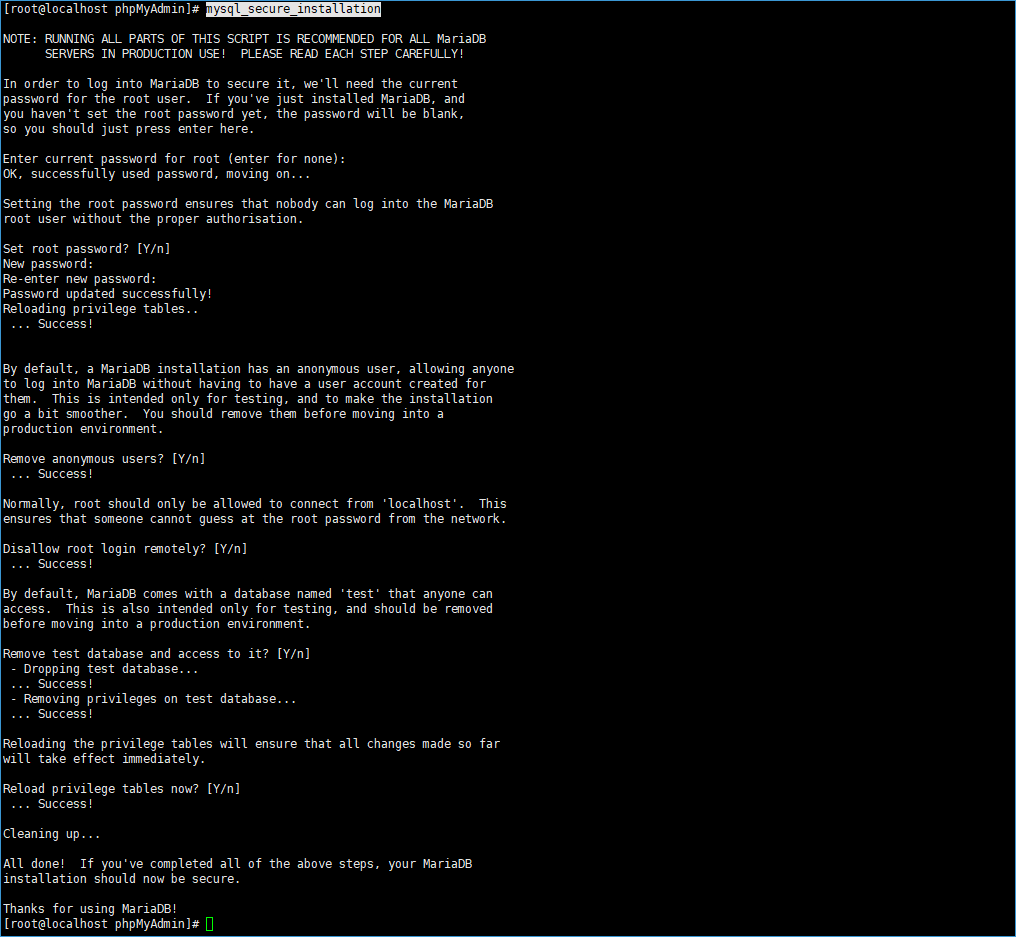
unzip phpMyAdmin-5.0.2-all-languages.zip


폴더명 변경 및 phpmyadmin 기본 세팅
mv phpMyAdmin-5.0.2-all-languages ../phpMyAdmin
chown -R apache:apache /var/www/phpMyAdmin
cd /var/www/phpMyAdmin
sed -e s/"blowfish_secret'] = ''/blowfish_secret'] = 'j0x;^T!IrLf_~!VeAL59|a+H|yr@kTc,'"/g /var/www/phpMyAdmin/config.sample.inc.php > /var/www/phpMyAdmin/config.inc.php
#아래 항목에 My Secret Password 대신 랜덤문자 작성

rm -rf /var/www/phpMyAdmin/config.sample.inc.php

vi /var/www/phpMyAdmin/config.inc.php
$cfg['blowfish_secret'] = 'My Secret Password';


mysql < sql/create_tables.sql -u root -p

이 글에서는 apache 위주로 구성하고 있습니다.
centos 8 phpmyadmin nginx 항목을 진행하시는 분들은 다른 설정을 참고하시기 바랍니다.
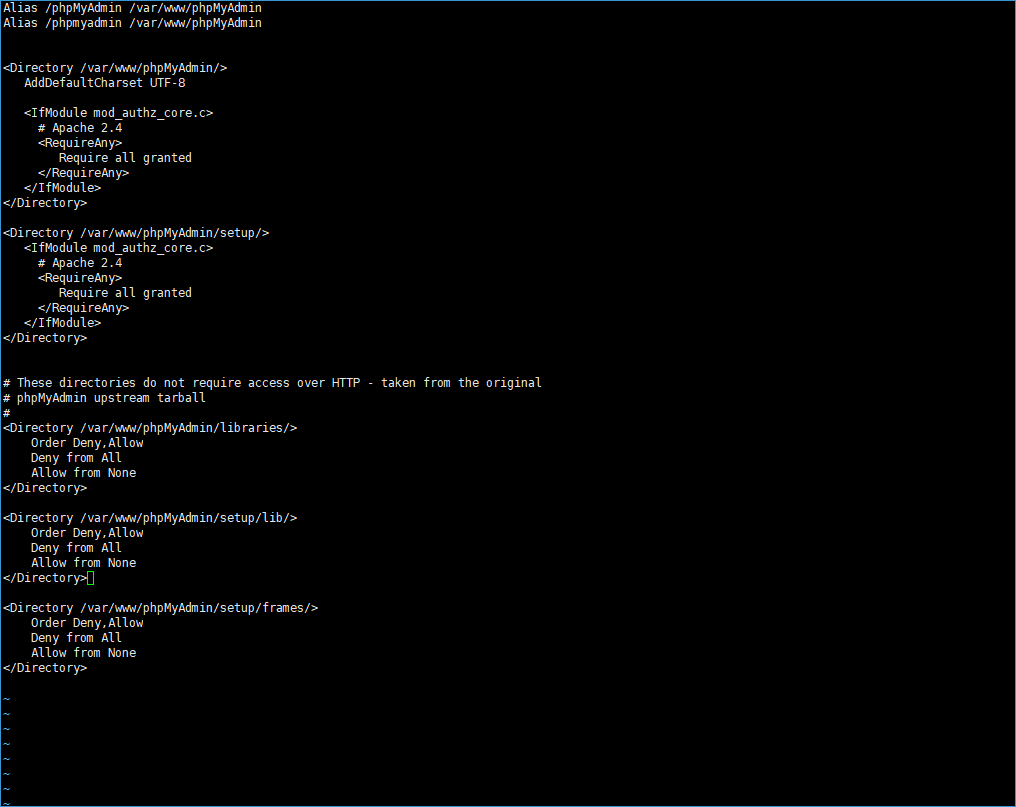
vi /etc/httpd/conf.d/phpMyAdmin.conf
아래 라인을 그대로 복사 붙여넣기
Alias /phpMyAdmin /var/www/phpMyAdmin
Alias /phpmyadmin /var/www/phpMyAdmin


<Directory /var/www/phpMyAdmin/>
AddDefaultCharset UTF-8

<IfModule mod_authz_core.c>
# Apache 2.4
<RequireAny>
Require all granted
</RequireAny>
</IfModule>
</Directory>

<Directory /var/www/phpMyAdmin/setup/>
<IfModule mod_authz_core.c>
# Apache 2.4
<RequireAny>
Require all granted
</RequireAny>
</IfModule>
</Directory>


# These directories do not require access over HTTP - taken from the original
# phpMyAdmin upstream tarball
#
<Directory /var/www/phpMyAdmin/libraries/>
Order Deny,Allow
Deny from All
Allow from None
</Directory>

<Directory /var/www/phpMyAdmin/setup/lib/>
Order Deny,Allow
Deny from All
Allow from None
</Directory>

<Directory /var/www/phpMyAdmin/setup/frames/>
Order Deny,Allow
Deny from All
Allow from None
</Directory>
systemctl start httpd
systemctl enable httpd
systemctl restart httpd
http://yourDomain/phpmyadmin
이제 도메인 주소에 설치한 phpmyadmin을 접속할 수 있습니다.


최신버전으로 모두 설치하다보니 phpmyadmin 까지 최신버전으로 업그레이드 하게되었다.
CentOS 8.2 리눅스 OS운영체제와 php 7.4.8 설치 그리고 phpMyAdmin 까지 모두 최신버전까지 설치완료
이제 wordpress 최신버전으로 설치하면 마무리가 된다.
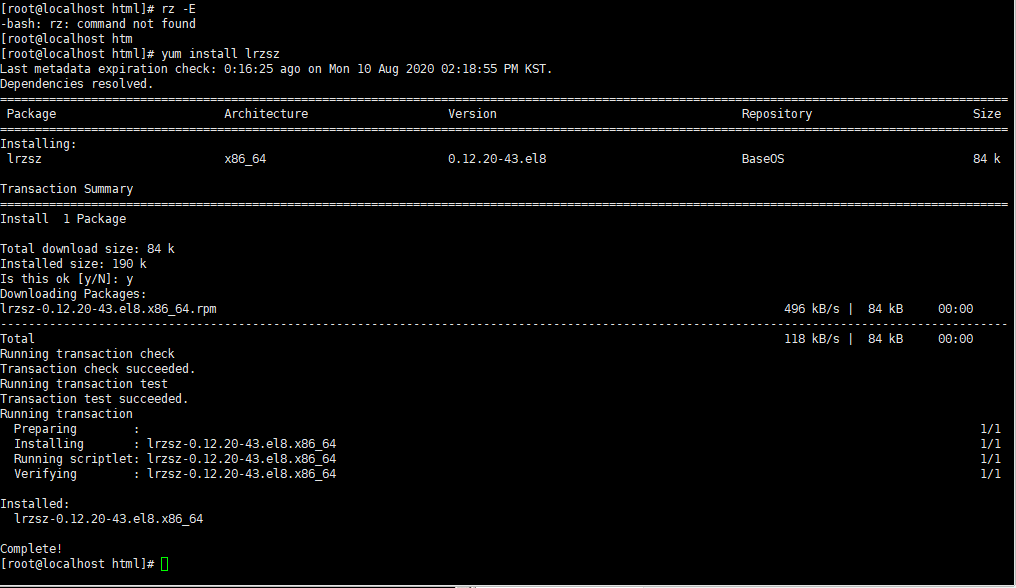
SSH lrzsz 설치안되었다면 아래 명령어입력 (이부분은 옵션입니다. 파일전송 시 드래그로 업로드 하기 위함입니다)
yum install lrzsz
동시접속자수 메모리 설정 하는 방법입니다.